Wednesday, 4 November 2020

Everything about Apple Silicon ARM-based Mac


Apple is launching a new 
ARM-based Mac series in the coming days and from that onwards, Apple Mac series will run on Apple Silicon.


What is Apple Silicon ARM-based Mac?


  • As you know Apple has its own A-series chipset in their iPhones and iPads and now they are launching the Apple chipset in Macs also.
  • Currently, Apple is using Intel-based chips in its Mac series and in coming days apple will use ARM-based M-series chipset.
  • Apple M-series chipset is way faster than many Intel-based chips in competing devices.

Is it the End of Intel Era in Mac?


Not immediately, but definitely by the end of 2022 Intel will no longer support Mac Series.


What will be the first Apple Silicon MacBook be?


As per sources, the first Mac to get an Apple Silicon processor will be the 12inch MacBook and it will launch by the end of the year 2020 with the price of $799.


Apple Silicon Macbook launch Date and Specification and Price?


MacBook Pro
Apple Silicon is launching a MacBook with a two variant 13inch and 14inch. 13inch Macbook pro will be launch on the fourth quarter of 2020 with the price range of $1099  to $1299 and 14inch Macbook pro will launch on the second or third quarter of 2021 with the price $1499 to $1699.

MacBook Air
Maybe Apple will launch MacBook Air by this end of the year 2020 or the first quarter of 2021 and the price range will be $799 to $999.

Mac Mini
Mac mini will be launched by the last quarter of 2020 and price is not specified yet.

iMac
Apple Silicon will launch iMac by the second or third quarter of 2021 and price is not disclosed yet.

Specifications

Apple Silicon Macbook mainly has an A14-Bionic chip which is a 64-bit ARM-based system and comes with 2 variant of 8GB and 16GB of Ram with a storage of 256GB, 512GB and 1TB.
The battery life is way better than the previous MacBook. It claims up to 15-20 hours of battery which is very impressive.

Software

Apple Silicon Macs will run on the new version of macOS called macOS Big Sur. This operating system will run on both types of Mac like, Intel-based Mac and ARM-based Mac.

The biggest advantage of Silicon Macs is that the iOS app will run on this which means one app could work on all platforms and developers won't have to develop separate versions of apps for Mac and iPad/iOS app.


Thursday, 8 September 2016

How to get Free Wi-Fi anywhere in the world

Hello Friends, If you are looking for a Free Wi-Fi Hotspots, then you are at the right place. Today, In this post I will teach you how to get free Wi-Fi Hotspots anywhere in the World. In this technique, you will need some useful tools and apps to locate free Wi-Fi Hotspots.

How to get Free Wi-Fi anywhere in the world?

Install Wi-Fi Scanner apps and tools:

It is not necessary to install Wi-Fi Scanner tools in your phone and laptops but sometimes your phone and Laptop's Wi-Fi Scanner fails to give you all the information about your area's Wi-Fi connections. In that case, you will need Wi-Fi scanner apps.


  • For Windows PC: If your Laptop's Wi-Fi is not working properly then you can try this app like WeFi and NetStumbler. Both Apps will detect area's Wi-Fi connections and give you a list of available networks with their channel, strength and security.
  • For Mac: Similarly, For Mac users, if your Wi-Fi is not working properly then you can try this app called iStumbler to generate a list of the nearby hotspots. iStumbler is a free app for Mac users. AirRadar is also an app who detect Wi-Fi Hotspots quickly, but Airadar is a payable app.
  • For Smartphones: In Android, there are lots of free apps which scan Wi-Fi Hotspot For, e.g., Wi-Fi Analyzer. And in iPhone, you can use Wi-Fi Tracker app to search Wi-Fi Hotspot.

Visit the Places that have Free Wi-Fi:

You will get Free Wi-Fi Hotspot at places like McDonald's, public libraries, Airport, Starbucks, Railway stations and many public places. So, If you want Free Wi-F, learn about the places that provide free Wi-Fi and visit them. Hotels, Businesses places, Restaurants, Cafes and Malls also offer you the Free Wi-Fi Hotspots. So, Go there and save your data.

Increase the limits of Free Wifi Hotspots by spoofing MAC address:

In some Malls and Restaurants, there will be a limited time for Free Wi-Fi Hotspots. To increase your limits, spoof your MAC address by using MAC Makeup tool. MAC Makeup app is an app which is used to spoof a new MAC address. Because of this your limited time will increase and you can enjoy the Free Wi-Fi Hotspots.

If you like this post then do share or if you have any query then comment it below.

Sunday, 24 July 2016

Hack your Friends Computer by doing this Amazing Tricks with Notepad

Notepad is a generic and well-known text editor which comes in all versions of Windows Operating System. Many peoples think it allows you to open and read plain text files but, this is not true, it can do many impressive things which will make your day and from this thing, you can scare your friends or neighbours. Today, In this post I will show you the Best Notepad tricks which you can do and scare your friends and neighbours.

Note: The following tricks will not harm your's computer. However if you want to get out of this tricks, just delete the notepad file and just restart your's computer. Your PC's will usually work as earlier was.

The Amazing tricks which can do with Notepad are:


1. Continuously Toggle On-Off the Caps Lock Button.

This trick will be continuously Toggling On and Off the Caps Lock Button. It will irritate your friends as hell.
  • Open the Notepad by typing notepad in a Search box or by pressing Win+R together and type Notepad in the dialogue box.
  • Copy the below code in the Notepad.
Set wshShell =wscript.CreateObject("WScript.Shell")
do
wscript.sleep 150
wshshell.sendkeys "{CAPSLOCK}"
loop
  • Now, Save the File with a .vbs extension rather than the Standard .txt extension. For eg: caps.vbs.

  • Now, Send this file to your friends and neighbours and ask them to open it.(Note: Do Not open on your Computer either it will affect you).

2. Continuously Open the DVD/CD Drive.


This Trick is my Favourite trick, In this thing, CD/DVD Drive will continuously open.
  • Open the Notepad by typing notepad in a Search box or by pressing Win+R together and type Notepad in the dialogue box.
  • Copy the below code in the Notepad.
Set oWMP = CreateObject("WMPlayer.OCX.7")
Set colCDROMs = oWMP.cdromCollection
do
if colCDROMs.Count >= 1 then
For i = 0 to colCDROMs.Count - 1
colCDROMs.Item(i).Eject
Next
For i = 0 to colCDROMs.Count - 1
colCDROMs.Item(i).Eject
Next
End If
wscript.sleep 4000
loop
  • Now, Save the File with a .vbs extension rather than the Standard .txt extension. For eg: cd.vbs.

  • Now, Send this file to your friends and neighbours and ask them to open it.(Note: Do Not open on your Computer either it will affect you).

3. Fool your's friend by hacking the friends keyboard to make it type something you want continuously.


By this trick, you can make your friend fool by hacking their keyboard.
  • Open the Notepad by typing notepad in a Search box or by pressing Win+R together and type Notepad in the dialogue box.
  • Copy the below code in the Notepad.
Set wshShell = wscript.CreateObject("WScript.Shell")
do
wscript.sleep 100
wshshell.sendkeys “I Hacked your PC.”
loop 
  • Changed the "I Hacked your PC" text and put something else you want.
  • Now, Save the File with a .vbs extension rather than the Standard .txt extension. For eg: hack.vbs.

  • Now, Send this file to your friends and neighbours and ask them to open it.(Note: Do Not open on your Computer either it will affect you).

4. Shut Down the Computer by showing Error message you want.


This trick will shut down your friend's computer and before shutting down, it will show your friends an error message like you want
  • Open the Notepad by typing notepad in a Search box or by pressing Win+R together and type Notepad in the dialogue box.
  • Copy the below code in the Notepad.
@echo off
msg * You fell for it again
shutdown -c “You are too stupid to open this” -s
  • Changed the "You are too stupid to open this" text and put something else you want.
  • Now, Save the File with a .vbs extension rather than the Standard .txt extension. For eg: shut.vbs.

  • Now, Send this file to your friends and neighbours and ask them to open it.(Note: Do Not open on your Computer either it will affect you).
If you like this post, then do share or if you have any query or any problem related to this post then comment it below.

Saturday, 23 July 2016

How to Hide your Drive in Windows by using CMD

Windows Command Prompt is a very Powerful tool to perform some tasks. It is usually used to do a task without using a third-party tool. Today in this post we are going to share another interesting topic on Comand Prompt. Today we are learning how to hide any drive in Windows by using CMD. You can also Hide drive by using a free tool such as DriveHide, but we are not using any third party software to do it same.

How to Hide any Drive in Windows by using Command Prompt?

To know how to hide any drive then, follow the steps given below.


Step 1: Type CMD in search area Box or in Run Dialog Box. Open CMD as run as Administrator.

Step 2: Type Diskpart in the CMD and Hit enter key, then Click YES if you are prompted with User Account Control (UAC) Dialog-box.


Step 3: After that, you will be prompted with new Command Prompt. Type List Volume and hit the enter key, and all the drives will be listed below.

Step 4: Now, Select the drive that you want to hide. Type Select Volume E or Select Volume 3 and hit the Enter Key (here, E is the Drive Letter, and 3 is the Volume Number).

Step 5: Now to Hiding a Drive, type Remove Letter E (Here E is the drive letter that you want to Hide).

Your Drive is Hide Now; you can close the CMD by typing exit command. Now check the drive on your PC.

Before Hiding
After Hiding

How to display the Hidden Drive by using CMD?

To know how to show Hidden Drive then, follow the steps given below.

Step 1: Type CMD in search area Box or in Run Dialog Box. Open CMD as run as Administrator.

Step 2: Type Diskpart in the CMD and Hit enter key, then Click YES if you are prompted with User Account Control (UAC) Dialog-box.

Step 3: After that, you will be prompted with new Command Prompt. Type List Volume and hit the enter key, and all the drives will be listed below.

Step 4: Now, Select the drive that you want to display. Type Select Volume E or Select Volume 3 and hit the Enter Key (here, E is the Drive Letter, and 3 is the Volume Number).

Step 5: Type Assign Letter E and hit the Enter Key to display the Drive.


Now your Drive will be displayed in Explorer.

If you like this post, then do share or If you have any query or any problem then comment it below.


Thursday, 14 July 2016

How to Play Pokemon GO Game


In the last post, I had posted how to download Pokemon GO game in any country, Today, In this post, I will guide you how to play Pokemon Go Game.

What is Pokemon Go?

Pokemon Go is a mobile game for Android and iPhone user. The Pokemon Company and Niantic are a developer of this game. This game aim is to locate, catch, battle and trade Pokemon and encouraged to connect with other nearby Pokemon GO players.

Pokemon Go is a free Game or paid Game?

Pokemon Go is a free app but in this game, you have to buy PokeCoins which will unlock the unique items within in the game. PokeCoins is nothing but a game currency in the Pokemon Go Game.
You can buy PokeCoins at the following prices.

100 PokeCoins: $1.04
550 PokeCoins: $5.24
1200 PokeCoins: $10.50
2500 PokeCoins: $19.70
5200 PokeCoins: $39.42
14500 PokeCoins: $105.14.

Pokemon Go Plus Cost is $34.99, and it will be available soon.

How to Play Pokemon Go?


Select your Avtar

When you install Pokemon Go game, the first thing you need to select the clothing for your Avtar. (Note: Pick Carefully because once you choose the clothing for your Avtar, then there is no way to alter this later).

How to Catch Pokemon?

To catch Pokemon, you have to step out your home and explore the world. If you tap on the Pokemon, Camera will be open automatically, and it will show you a Pokemon somewhere near you. Pokemons are out there, and you need to find them. If your smartphone will vibrate it means, Pokemon is nearby. Take an aim and throw a PokeBall to catch them and finally, the Pokemon is your's (Note: You will have to stay alerted. or it might run away).

Where to search Pokemon?

Pokemon appear near their native environment like If Pokemon is a water type then Pokemon will be found in lakes and oceans. Pokemon will be found at interesting places like historical markers, museums, monuments and art installations.

How to earn Extra Points?

For every Pokemon, you catch you will get 100 XP points and 100 stardust. If you catch a Pokemon which you haven't seen before then, you will get an extra 500 XP, which will be added in the PokeDex. You will get extra XP points if you throw Pokeball perfectly.

How to earn extra PokeBalls?

You can collect more PokeBalls from PokeStops, which are mainly found in towns and cities or interesting places. You can also buy PokeBalls with coins in the Shop.

Catching, and Hatching

As your levels go up, you will be able to catch more powerful Pokemon to complete your Pokedex. You can also hatch Pokemon Eggs based on the distances you walk.

How to train your Pokemon?

To interact with the Gyms, your Level must be above five. Pokemon GO provides you three type of Gyms on the board: Neutral, Rival and friendly. You can also Evolve your Pokemon by providing training For e.g., Charmander evolves to Charmeleon and then Charizard.

What is a PokeBall?

A PokeBall is a ball which uses to catch the wild Pokemon. You can also collect more PokeBalls from PokeSops.

What is a PokeStop?

A PokeStop is a place from which you can easily win rewards by visiting it. In order to access you need to be near the PokeStop. If a blue circle appear, it means you are close enough, and If you visited the PokeStop it would turn to Blue.

What is PokeDex?

The PokeDex is a catalogue of all the Pokemon you have caught yet.

If you like this post, then do share or if you have any query then comment it below or if you have any problem in playing this game then also comment it below.

Wednesday, 13 July 2016

How to download Pokemon Go in any country

From last two weeks, you have been hearing about Pokemon Go Game. Pokemon Go Game is an adventurous game, and it will make your body fit by running and catching the Pokemon. If you have an Android Devices, and it will be available in your Country, then you can officially download Pokemon Go app from Play-Store, but if this game is unavailable in your Country, then you can download the APK file from other sites. Today, In this post we will see how to download Pokemon Go app in any country
Pokemon Go Game is available in America, Australia, NewZealand, Canda, Portugal, France and much more. To know more see the image below.
If you don't live in the above Country, then you have to wait for official launch or Download APK file from the other site.

To Download Pokemon Go Officially, Go to Play-Store and install Pokemon Go.

How to Download Pokemon Go unofficially?


There are two sites to Download Pokemon Go APK

To know How to Download Pokemon Go app from the site follow some steps.

  • Download Pokemon Go APK file from apkpure.com or apkmirror.com
  • If you are on Android phone, then you have first to Switch ONN the Unknow Sources. To Switch ONN the Unknown sources, Go to Settings >> Security >> and allow for the installation of apps from unknown resources.
  • If you are on a PC, then attach your phone via USB Cable and copy the APK file to your phone. 
  • Now, Install the Pokemon Go app and enjoy it.

Note:

  1. Pokemon Go app is a free app, and it is optimised for smartphones, not for tablets.
  2. Compatible with those Android devices which have 2 GB RAM or more and have Android Version 4.4 to 6.0.
  3. Pokemon Go won't work on Android N because Android N is a newly version of Android.
  4. It is not compatible with those Android devices which use Intel Atom processors.
  5. In some devices Application will not work even, they have compatible OS versions installed.
  6. To obtain accurate location you have to connect with a good network.
If you Like this post, then do share or If you have any query related to this topic then comment it below or have any problem to download the app then also comment it below.

Sunday, 10 July 2016

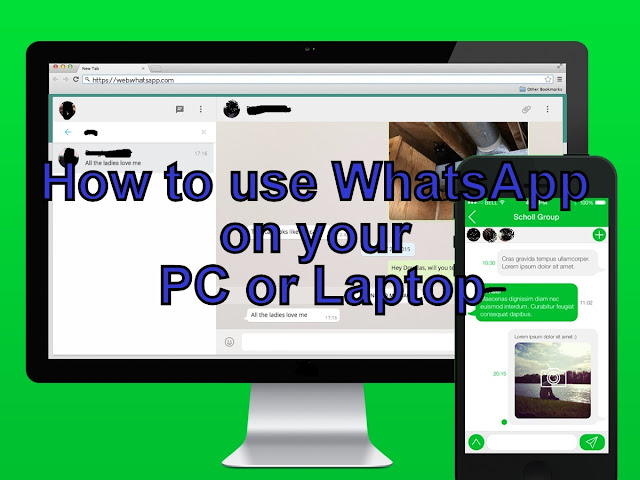
How to use WhatsApp on your PC or Laptop


WhatsApp app is a most innovative app which is used to communicate with our friends and family members by sending and receiving messages and media. Earlier, WhatsApp app is used only in mobiles, Now, we can communicate with our friends and family members via PC or Laptop by downloading WhatsApp app or activating WhatsApp Web on PC and Laptop. Today, In this post I will show you how to use WhatsApp on your PC or Laptop.

There is two way to use WhatsApp on your PC or Laptop

Type I: Activate WhatsApp by using WhatsApp Web

To Activate WhatsApp Web you need to follow this steps
  • Go to https://web.whatsapp.com/ to enable your WhatsApp Web.
  • First Time, it will ask you to Scan your QR code. Scan QR Code by displaying Mobile on Screen(Use WhatsApp app on your phone to Scan the QR Code).
For Android User
Open WhatsApp >> Menu >> WhatsApp Web

For Iphone User
Open WhatsApp >> Settings >> WhatsApp Web
  • Now your WhatsApp screen will appear on your PC or Laptop, and now you can communicate with your friend quickly.

Type II: Activate WhatsApp by Downloading WhatsApp App for PC or Laptop.


It is very easy to download WhatsApp app on your PC or Laptop. This WhatsApp app supports both on Windows and Mac system.

Step 1: Go to https://www.whatsapp.com/download/  and download the Desktop Application for your Windows and Mac System.

Step 2: Once you downloaded the WhatsApp.exe file, Run the file and wait for some time because it may take a time to install it.

Step 3: Restart your PC or Laptop after installing it.

Step 4: Open WhatsApp Desktop application. The first time, it will ask you to Scan your QR code.Scan QR Code by displaying Mobile on Screen(Use WhatsApp app on your phone to Scan the QR Code).

For Android User
Open WhatsApp >> Menu >> WhatsApp Web

For Iphone User
Open WhatsApp >> Settings >> WhatsApp Web

Step 5: By this way, you can use WhatsApp on your PC or Laptop.

Here are some missing features which you can't use in WhatsApp Desktop Applications 

Missing Features on Whatsapp Desktop App

  • In WhatsApp Desktop Application, You can not Create New Broadcast List. However, You can send messages in existing Broadcast List.
  • You can not view "Starred Messages" in WhatsApp Desktop Application.
  • WhatsApp Desktop Application does not support Backup option because it is a mirror of your mobile app and all messages are being stored in your Mobile app only.
  • As I said earlier, WhatsApp Desktop Application is just a Mirror of your mobile app. Because of this, you won't get the WhatsApp Call feature.
  • You won't be able to download WhatsApp images and other media automatically hence you have to download manually, there is an option on WhatsApp Desktop Application from where you can download it, and it will store on your Harddrive.
If you like this post then do share with your friends and family member or If you have any query or any problem to access WhatsApp on your PC or Laptop then comment it below.

Sunday, 3 July 2016

How to Create a Virtual Wi-Fi Hotspot by using CMD

In Today's World Internet Connectivity has become one of the most important things that we need. It would be more helpful when we get a fast internet connection, and it would be the most helpful when we get a Wi-Fi Connectivity. From Windows 7 towards Microsoft includes the virtual Wi-Fi hotspot features. Today I will show you how to create a Virtual Wi-Fi Hotspot on your Laptop by using CMD and without using any third party utility. It will support on Windows 7, Windows 8 and Windows 10.

To know how to create a Virtual Wi-Fi Hotspot on Windows then follow some steps:


Step 1: Open CMD and run as Administrator.

Step 2: Check the Driver is it install or not?

netsh wlan show drivers
If Hosted network supported will be yes, then you can further continue the step


Step 3: To Create a Virtual Wi-Fi

netsh wlan set hostednetwork mode=allow ssid= mywifi key= password
 You can change the SSID name and key
For, e.g.,
ssid= MyRouter
key=123456789

Step 4: To Start a Wi-Fi

Make sure that your Wi-Fi is ONN.
netsh wlan start hostednetwork

Step 5: To Access the Internet

Open Network and Sharing Center >> Ethernet >> Properties >> Click on Sharing Tab >>  Tick on all the Checkboxes and select the Home networking connection from the Drop Down List (Make sure that your Home networking connection is same as your Wi-Fi connection).

Step 6: To Stop a Wi-Fi

netsh wlan stop hostednetwork

Create a Shortcut on Desktop

Create a shortcut to Start Wi-Fi

        Right click on Desktop >> Shortcut
import: netsh wlan start hostednetwork >> next
import: Start Wi-Fi >> Finish

Create a shortcut to Stop Wi-Fi

Right click on Desktop >> shortcut
import: netsh wlan stop hostednetwork >> next
import: Stop Wi-Fi >> Finish

Now you can easily ONN and OFF Wi-Fi.


Here is a Video of it

If you like this post, then do share or if you have any query then comment it below.

Wednesday, 29 June 2016

Bypass the Android devices pattern or password without losing your data

In Today's world, Android operating system is the most used operating system. For every update, Google makes it more secure. If you ever forgot your mobile pattern or password, then you will try to bypass the security. In this case, you will try to reset your mobile, but you will lose your data. Today, In this post I will teach you how to Bypass the Android pattern or password without losing your data,

How to Bypass the Android device pattern or password by two ways

Type I: Bypass the Android devices pattern or password without losing your data:


Step 1: Download Aroma File Manager from this link

Step 2; After downloading Aroma File Manager, move it to your SD card (memory card) via USB Cable or Card Reader.

Step 3: Now, Insert the memory card into your locked Device.

Step 4: Switch off your phone and press power key and volume key up and down together to open Recovery Mode. If you get any problem to go into recovery mode, then google it because different phones have different methods to open Recovery Mode.

Step 5: After entering into Recovery Mode, Scroll up and down by using Volume+ and Volume- buttons and for a select use middle button.

Step 6: After that select "Apply update for SD Card" and give a path to install "Aroma File Manager".


Step 7: After Installing Aroma File Manger, it will open recovery mode.

Step 8: From the Aroma File Manger navigate to settings and click on "Automount all devices on start" and then exit.

Step 9: Repeat Step 6 and Step 7 again.

Step 10: Aroma File Manager will open again

Step 11: Navigate to Data Folder -> System Folder and Find "password.key" or "gesture.key" (password.key for password lock and gesture.key for Pattern lock respectively).

Step 12: Delete any one file and then exit from Aroma File Manager and reboot your Android Device.

Step 13: After Rebooting you will notice that the password or pattern lock is not removed yet. Don't worry, Type any password or draw any pattern to unlock your Android Device. (Note: Remember that password or pattern that you typed or drawn yet).


Type II: Bypass the Android devices pattern or password by doing Factory Reset.


This type is very useful when you don't have a PC or a Laptop.

Step 1: Switch off your phone and press power key and volume key up and down together to open Recovery Mode. If you get any problem to go into recovery mode, then google it because different phones have different methods to open Recovery Mode.

Step 2: After entering into Recovery Mode, Scroll up and down by using Volume+ and Volume- buttons and for a select use middle button. 
Select "Factory Data Reset" option and after that select "Wipe Cache Partition" to wipe cache data.

Step 4: Reboot your device. Now your device will start from the start.

If you like this post then do share or if you have any query then comment it below,

Sunday, 19 June 2016

Share your Wi-Fi Networks and Passwords by using QR Codes

There was a trend where your friends want to get your Wi-Fi password, and they had to type Long and complicated Wi-Fi password, and now your friend has to scan the QR Code to connect with Wi-Fi. Today in this post, I will show you how to share your Wi-Fi Networks and Passwords by using QR Codes.

There are a lot of sites which generates QR Code for Wi-Fi passwords. The QRStuff and ZXing this two QR Code generator website are famous for Wi-Fi password generator. Select proper contain from the drop-down list and Fill ups all the details like SSID (Network Name) and Password and also choose the right encryption type. After filling details, click on Generate button and get your QR Code. From this sites, you can download, print and email QR code directly from the Website.


To connect with Wi-Fi directly by using the QR Code, your friend will need to have a barcode scanner on their phone. There are a lot of Barcode Scanner app on Android select any one of them and scan the QR code which you generated a few seconds ago.

Only IPhone users can't connect to the Wi-Fi directly, but they will be able to see the username and password, which they can copy and paste.

If you like this post, then do share and comment it below or If you have any querries then contact us.